Hold on to your hats. This will be a long entry, but there will be lots and lots of pictures.
So Wednesday I got tired of not having a proper Facebook cover image. I'd originally planned for a character collage, but it ran into some sizing problems and... in a nutshell, it's been languishing in half-doneness for a few months.
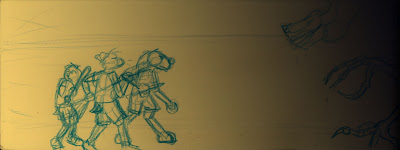
So because I felt like drawing, and inspired partly by the thunderstorm raging outside, I sat down at 9 o'clock at night and drew this:
 |
| From left to right: Leah, Beth, Marvin, and an evil shape-shifting space-alien. |
The blue colored pencil is a new technique I've been trying lately thanks to a
step-by-step process by Kazu Kibuishi who makes the comic
Copper. Here I wasn't utilizing the tactic of inking then removing the blue in photoshop for clean lines. In fact, I didn't want any outlines at all for this one. But sketching in good-quality colored pencil is much more fun for me than drawing with graphite, the wax goes down with less effort making a more readable drawing.
I scanned the above image the next morning at about 9am, then brought it into Photoshop. Another thing I've recently learned is always start with a background color. I chose a gradient to help my brain wrap around the light and shadows.
 |
| Background gradient and original sketch set to "Multiply". |
Then I colored the base colors of all the characters and their accessories. It must be noted this is the first time I've colored my alien character Marvin in his "Earthling" disguise (his fur is dyed black. His natural fur-color is a garish shade of spring green.)
 |
| Character base colors. |
Next I added the road surface they're standing on. I used a speckled brush set to a really big setting to give it some texture.
 |
| Road |
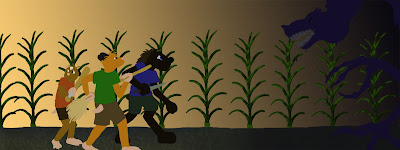
Then I turned my attention to the background. I dislike drawing backgrounds, so I try to keep things simple. For this one I needed a cornfield though, because the scene is part of a larger story and that story happens to be set in the middle of farmland. But this is a character-focused drawing, so I decided to go easy on myself.
First, I made a corn plant:
 |
| Just realized I forgot the ears. It's corn, trust me. |
Then, I duplicated the corn.
 |
| Corn. |
Then I made three more layers of corn, using rudimentary linear perspective to get the sense of rows (I did use a reference image to estimate the spacing. I'm from the country, but I'm not
that country.) For each layer I used the Levels tool to make the corn slightly darker and the "Gaussian Blur" filter with a slightly higher setting each time to create depth.
 |
| Corn rows. |
At this point, I can't remember what order I did things, but the background went something like this:
 |
| Sky with stars made using the "star" brush. |
 |
| Soil gradient, layered under road and sky. |
Then I stared adding shadows, which I always make with a layer set to "multiply" and a brush color set to 50% grey, then change layer opacity to taste. Added to the corn, it made a more dramatic effect.
 |
| Shadows added to corn. |
Then there was the matter of the distant hedge-rows and horizon line. This was simply a large speckle brush of a dark green color. I've hidden the corn so you can see it better.
 |
| The name of the game is "Suggestion", not "Detail". |
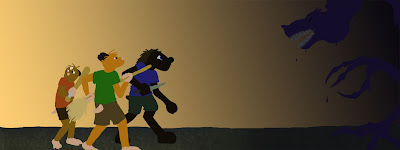
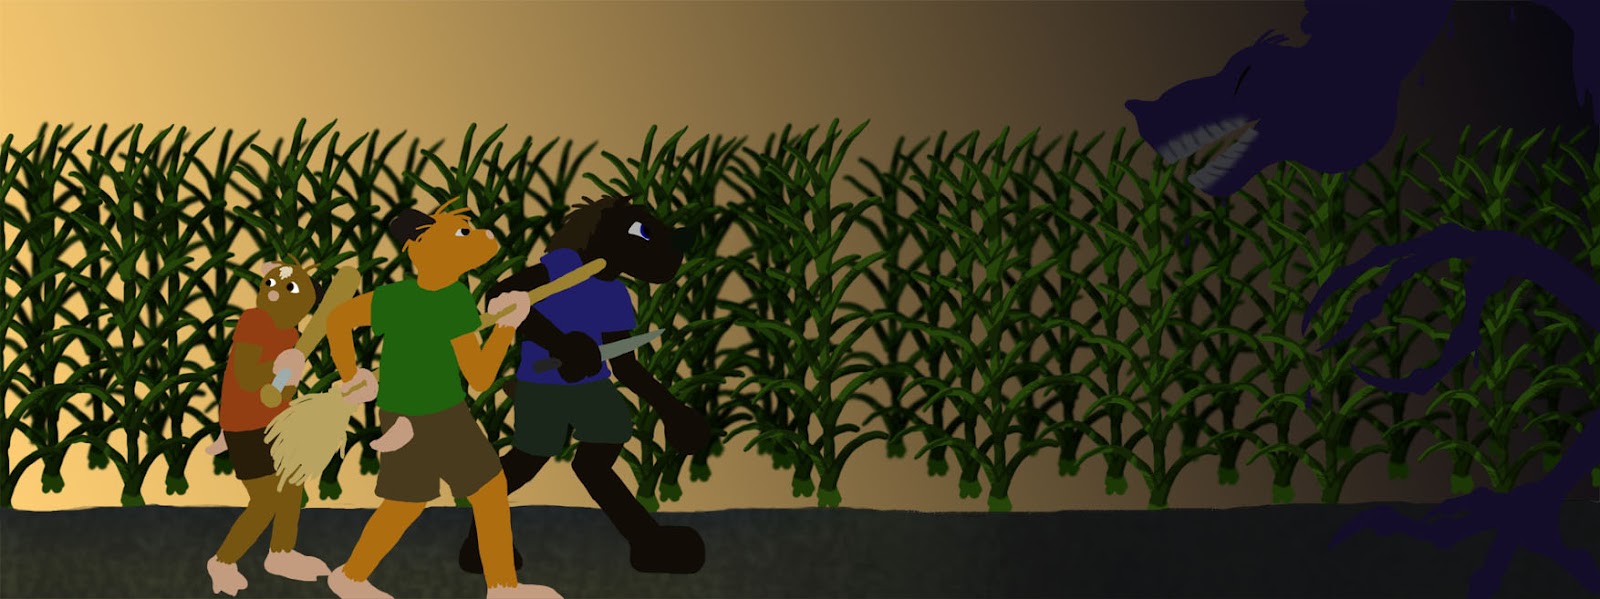
With the background elements in place, I duplicated the original background gradient and brought it between the background and the characters, setting it to "Overlay". This gives the whole thing a nice dramatic tint. Note that the characters are on top of the tinting layer, so they are unaffected.
 |
| Drama! |
Finally, I focus on the characters. I added the shadows in three passes for each character, that's 12 layers total just for the character's shadows in this piece. Again, this was done with a layer set to "multiply" and a grey brush color. The benefit to all these layers is control. If I change my mind and want a shadow darker or lighter, all I have to do is move a dial rather than erase and re-draw. By having shadows on a separate layer from the base color, I can lock the base color layer and play with the shadows freely without fear of messing up my earlier steps.
 |
| Grounding shadows added. |
 |
| Character shadows, first pass (aka the lightest shadows) |
 |
| Character shadow second-pass (darkest shadows) and extra line-work added like mouths and pockets. |
Next are the highlights, which I do with a layer set to "Screen" (sort-of the opposite of "Multiply") and a brush set to the background color that I'll be highlighting. I always mess with the opacity on the highlight layers. This is where an object becomes either matte or shiny, which was essential for the hairless, putty-like shape-shifter alien. Other places, like Beth's green shirt have no highlights at all. The difference is hardly noticeable, but a good highlight will bring out the shadows more and show texture.
 |
| Highlights added. |
And if you ever wanted to make a transparent character, here's the part where you hide the base color and get something like this:
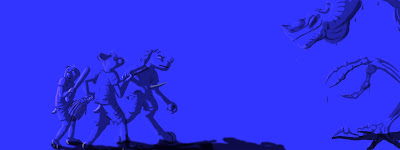 |
| I know there's a Terminator reference here, but I never watched Terminator. |
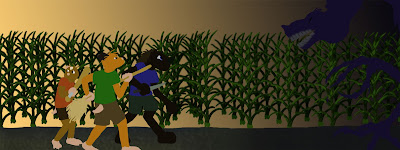
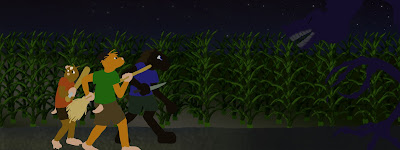
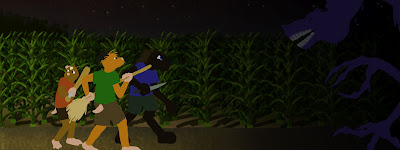
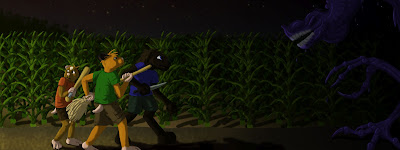
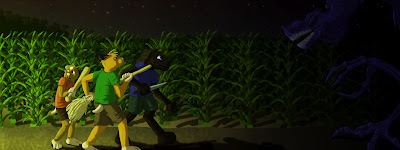
Last, I added some atmospheric effects. A yellow-to-transparent gradient set to "Overlay" and 73% opacity gives the effect of oncoming headlights from the left.
 |
| Headlight effect. |
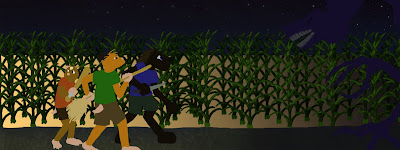
Another gradient of navy blue set to "Overlay" and 58% gave an extra aura of darkness for the shape-shifter to be emerging from.
 |
| Dark and spooky. |
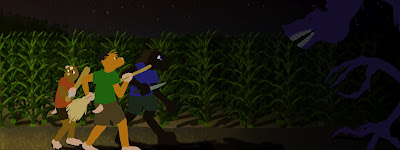
I added a grey-scale adjustment layer to check the color contrasts and to any last minute level-altering (adjustment layers filter the image without changing any information on the actual layers. It can be turned on/off with a single button)
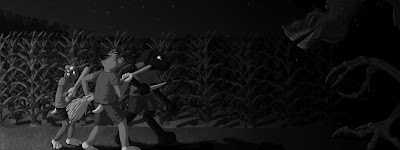 |
| Greyscale check. Marvin kinda... disappears. But there's nothing for it. |
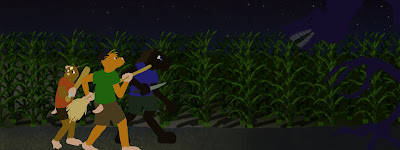
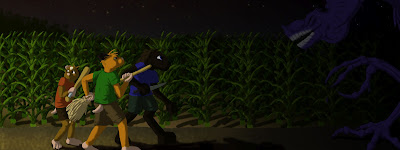
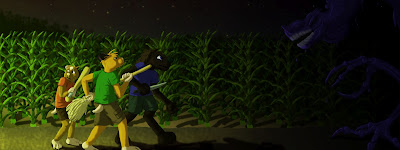
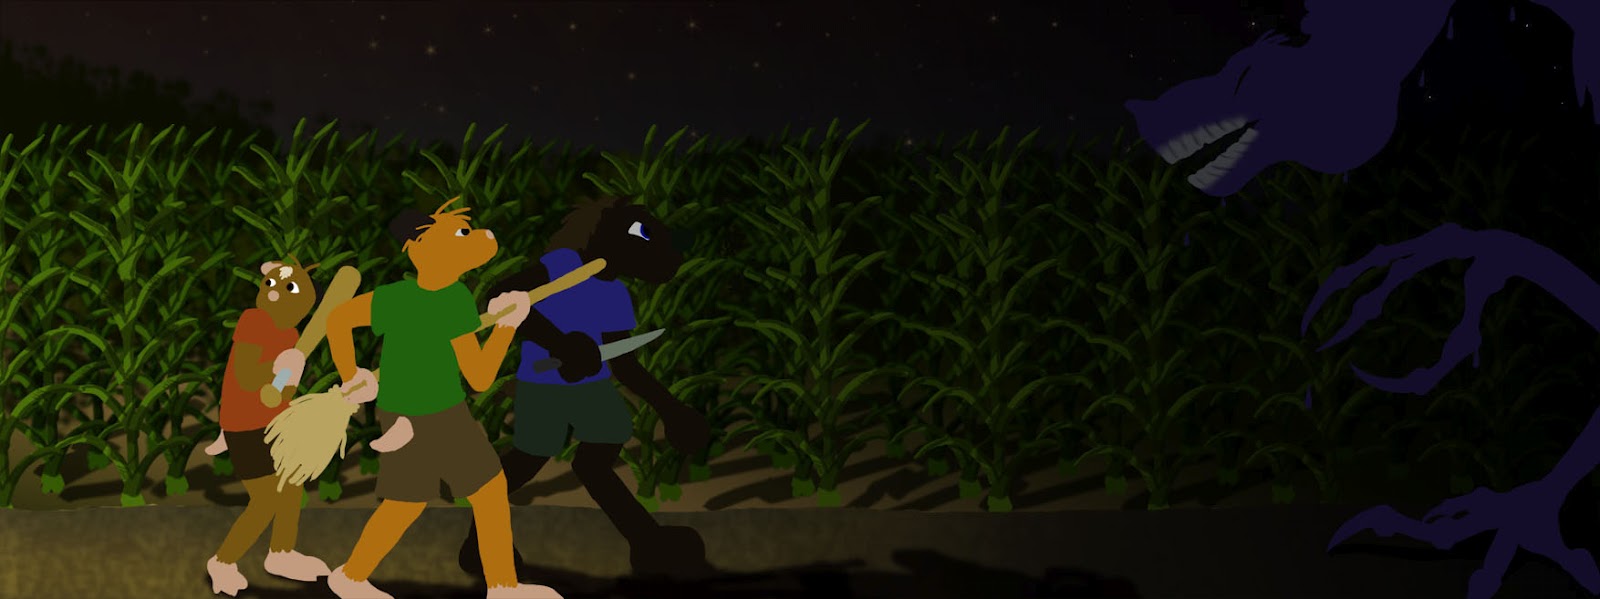
Then I exported the whole thing as a .jpg image and posted it as my new Facebook cover. I finished at about 6:30 pm yesterday. So with the exception of the original sketch, this really was a one-day project. That's got to be a personal record.
 |
| Click for full-sized image. |
Earworm of the Day: Tired of Lindsey Stirling yet? I'm not.
On the Floor Take Three.


That is so cool. :D
ReplyDelete